> ## Documentation Index
> Fetch the complete documentation index at: https://docs.chemolytic.com/llms.txt
> Use this file to discover all available pages before exploring further.
# Sensors
> Register the spectrometers used in your project and understand how Chemolytic uses them.
A sensor in Chemolytic represents a physical spectrometer in your lab. Every spectrum you upload is linked to the sensor that produced it. This matters for three reasons:
* **Reproducibility**: models are trained on spectra from a specific instrument. Linking each spectrum to its sensor means you always know exactly what hardware produced your training data.
* **Traceability**: when a prediction is made months or years later, you can trace it back to the instrument, its configuration, and the original calibration data.
* **Resilience over time**: if an instrument is replaced or recalibrated, you can register the new sensor separately, retrain, and compare models side by side without losing historical data.
## Sensors page
Go to **Sensors** in the project sidebar to see all sensors registered in the project.
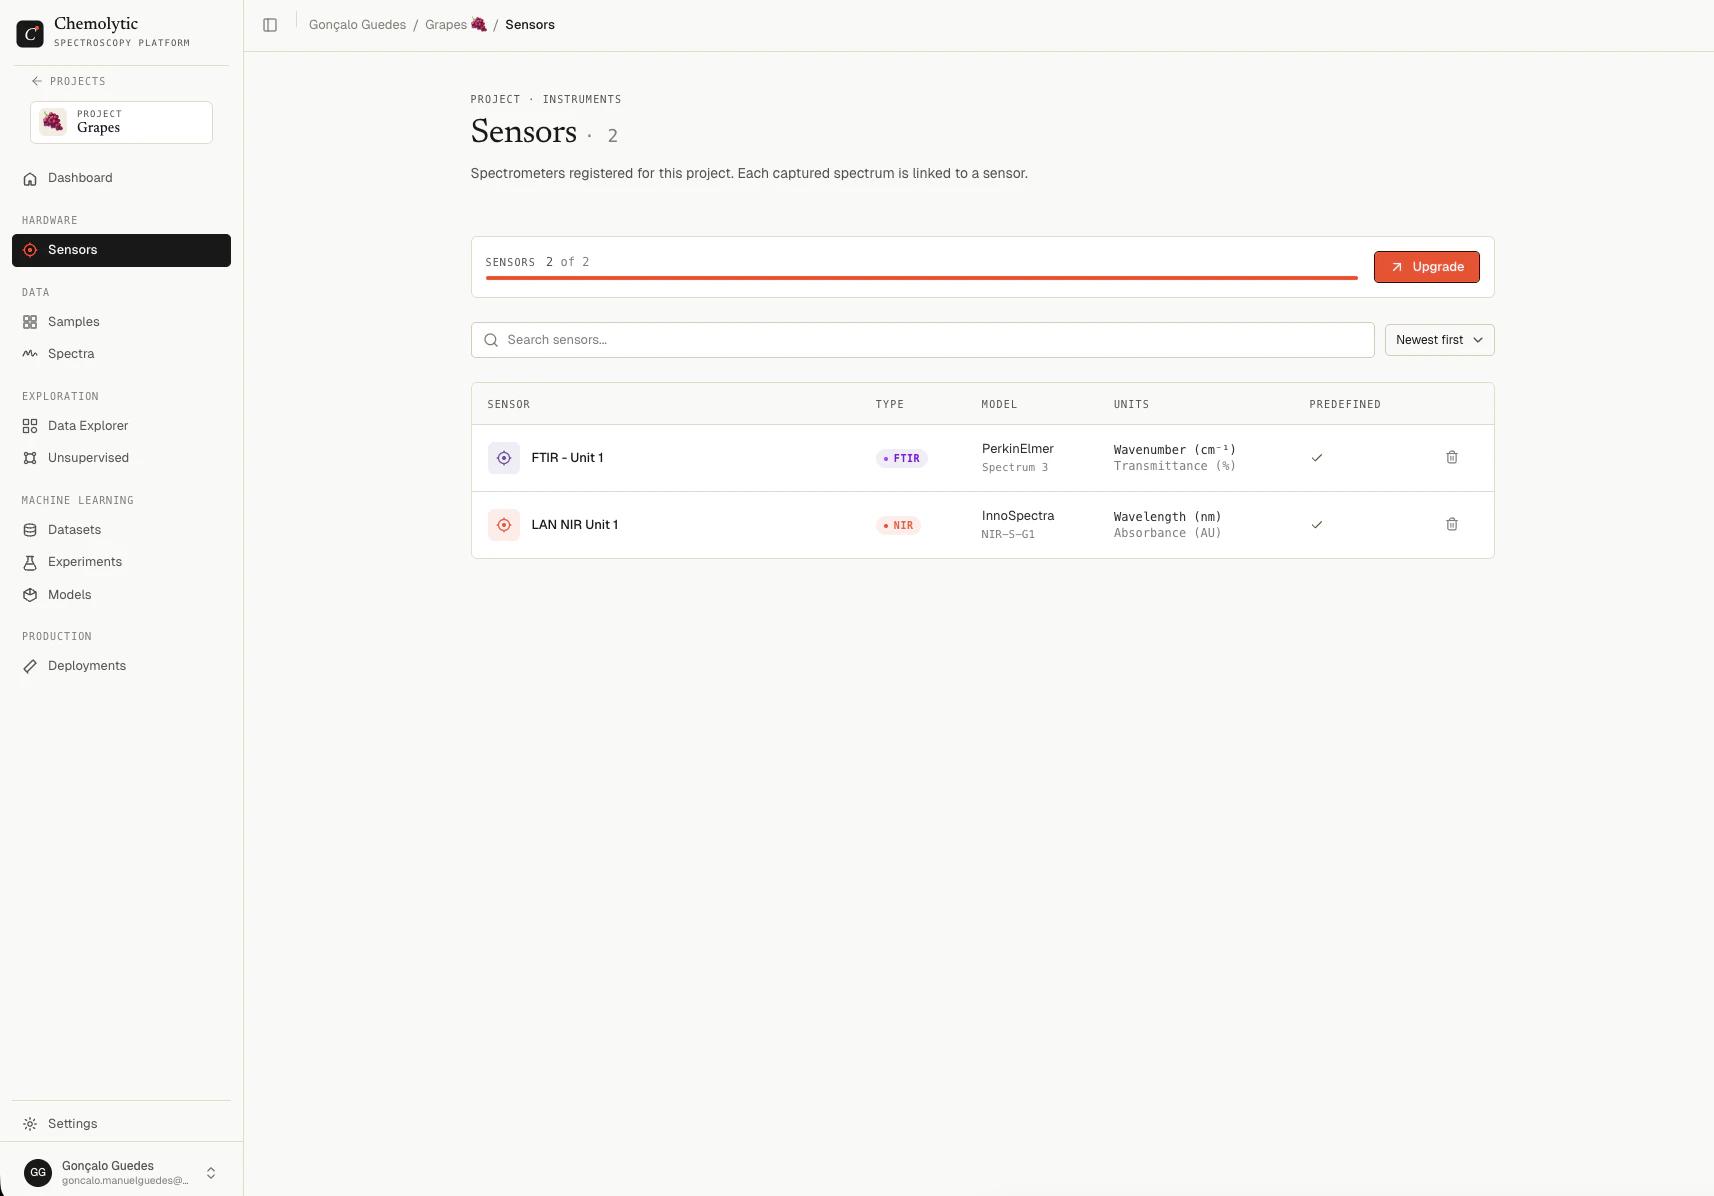 Each sensor shows:
| Column | Description |
| -------------- | ------------------------------------------------------- |
| **Sensor** | Name and optional description |
| **Type** | Spectroscopy technique (NIR, FTIR, SWIR, Raman, UV-Vis) |
| **Model** | Manufacturer and model name |
| **Units** | X unit / Y unit (e.g., nm / Absorbance) |
| **Predefined** | Checkmark if from the catalog, dash if custom |
You can search sensors by name and sort by: newest, oldest, name A-Z, or name Z-A.
Your plan limits how many sensors you can add per project. The current count and limit appear at the top of the page.
## Sensor detail
Click any sensor row to open the detail panel.
Each sensor shows:
| Column | Description |
| -------------- | ------------------------------------------------------- |
| **Sensor** | Name and optional description |
| **Type** | Spectroscopy technique (NIR, FTIR, SWIR, Raman, UV-Vis) |
| **Model** | Manufacturer and model name |
| **Units** | X unit / Y unit (e.g., nm / Absorbance) |
| **Predefined** | Checkmark if from the catalog, dash if custom |
You can search sensors by name and sort by: newest, oldest, name A-Z, or name Z-A.
Your plan limits how many sensors you can add per project. The current count and limit appear at the top of the page.
## Sensor detail
Click any sensor row to open the detail panel.
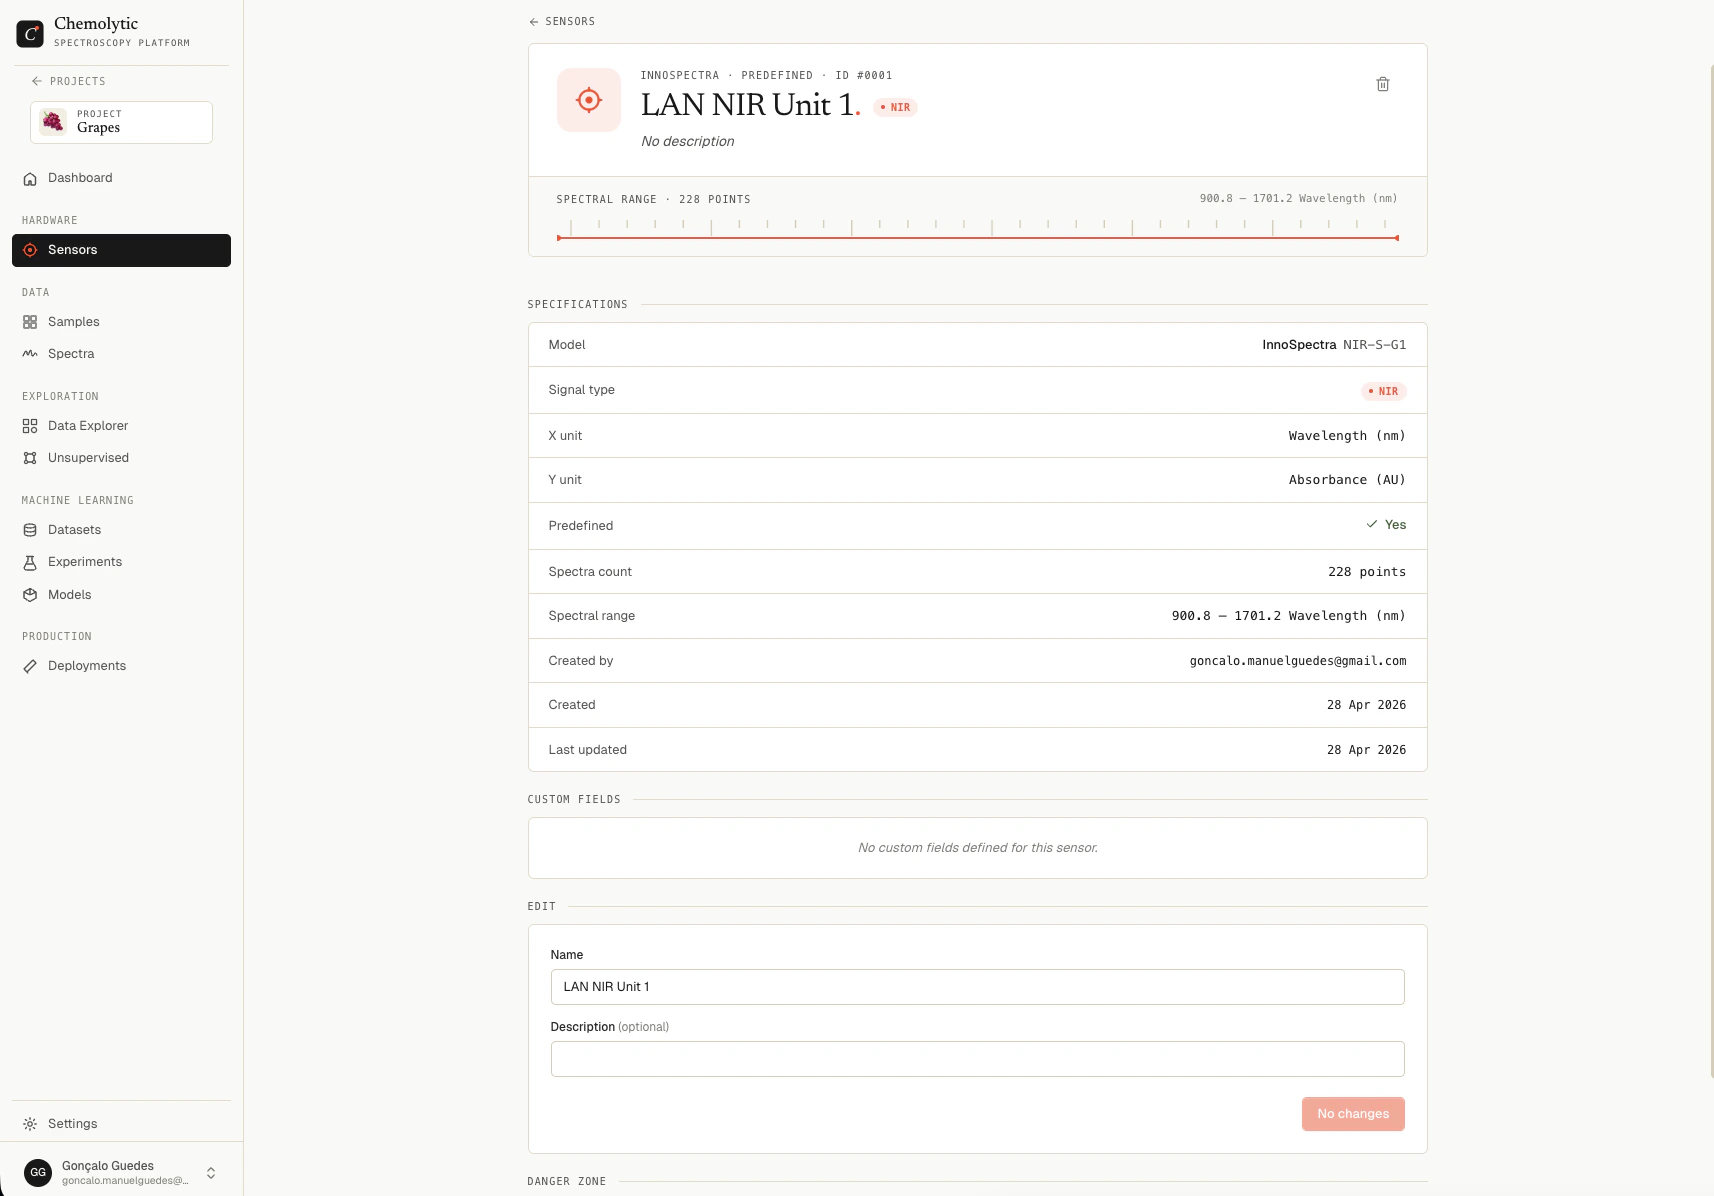 The detail panel shows:
* **Created by** and **Created** date
* **Predefined**: whether the sensor came from the catalog
* **Points**: number of data points per spectrum (appears after the first spectrum is uploaded)
* **Range**: actual min and max x-axis values detected in uploaded spectra (appears after first upload)
* **Custom fields**: any metadata you added (serial number, location, firmware version, etc.)
### X-axis setup
When you upload the first spectrum for a sensor, Chemolytic reads the x-axis values from that file and locks them as the sensor's calibration template. All subsequent spectra uploaded to that sensor must have the same number of points and the same x-axis range.
This is automatic and not user-editable. It ensures all spectra from the same sensor are directly comparable.
Once the first spectrum is uploaded, the x-axis is locked. If you need a different x-axis (e.g., different resolution or range), create a new sensor.
## Editing a sensor
In the detail panel, scroll to the **Edit** section. You can update the **Name** and **Description**. All other fields (type, units, model) are set at creation and cannot be changed.
Click **Save changes** when done.
## Deleting a sensor
You can only delete a sensor that has no spectra linked to it. Delete or archive all associated spectra first, then return here to remove the sensor.
In the detail panel, scroll to the danger zone and click **Delete**. A confirmation dialog appears before anything is removed.
Only users with the **Contributor** role or higher can delete sensors.
The detail panel shows:
* **Created by** and **Created** date
* **Predefined**: whether the sensor came from the catalog
* **Points**: number of data points per spectrum (appears after the first spectrum is uploaded)
* **Range**: actual min and max x-axis values detected in uploaded spectra (appears after first upload)
* **Custom fields**: any metadata you added (serial number, location, firmware version, etc.)
### X-axis setup
When you upload the first spectrum for a sensor, Chemolytic reads the x-axis values from that file and locks them as the sensor's calibration template. All subsequent spectra uploaded to that sensor must have the same number of points and the same x-axis range.
This is automatic and not user-editable. It ensures all spectra from the same sensor are directly comparable.
Once the first spectrum is uploaded, the x-axis is locked. If you need a different x-axis (e.g., different resolution or range), create a new sensor.
## Editing a sensor
In the detail panel, scroll to the **Edit** section. You can update the **Name** and **Description**. All other fields (type, units, model) are set at creation and cannot be changed.
Click **Save changes** when done.
## Deleting a sensor
You can only delete a sensor that has no spectra linked to it. Delete or archive all associated spectra first, then return here to remove the sensor.
In the detail panel, scroll to the danger zone and click **Delete**. A confirmation dialog appears before anything is removed.
Only users with the **Contributor** role or higher can delete sensors.